Drawing Fundamentals
Table of Contents
Drawing Fundamentals
Learning outcomes:
By the end of this chapter, you will be able to:
- Learn about a different types of pencil grips
- Draw straight lines, good circles, fluent curves, reverse curves, and basic shapes
- Understand the importance of basic shapes used for drawing objects
- Draw objects using basic shapes
- Use basic construction methods to create precise drawings
- Manipulate the volume of basic shapes
You would need the following to get started:
- A set of graphite pencils. Graphite pencils are available in 20 different levels of hardness ranging from 9H to 9xxB. 9H is the lightest, 9xxB the hardest.
- As a beginner, you only need HB, 2B, and a couple of hard grades (5B or 6B) pencils.
- A few sheets of paper – your standard printer paper will suffice.
- A drawing table or a desk.
Art medium – An artist’s tools:
Anticipation
Artists often use different mediums to create their art. Skilled artists have knowledge of these various mediums and can efficiently use them to produce rich, colorful and detailed work. Given below are a few examples of commonly used and well-known art mediums:


Pencil Grips:
There is no ‘correct’ way of holding a pencil while drawing. It is a matter of personal preference and comfort. However, there are ways to hold a pencil that will help you draw more efficiently. These techniques or grips as you may call them, depend on what suits your situational needs.
Tripod Grip:
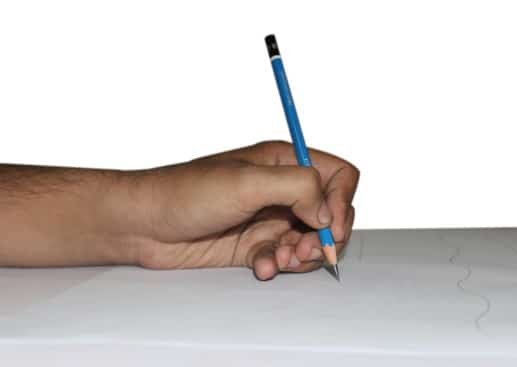
The basic tripod grip is normally used for daily life writing. The thumb and forefinger form a triangle with the middle finger as shown above. This is supported by the ring finger and little finger. Holding a pencil this way is ideal for drawing fine detail. The upright position of the pencil allows for accurate shading with the tip. When you hold a pencil using the tripod grip, you use your fingers and thumb to control the pencil while the hand rests on the page. The rear end of the palm may create smudges on a heavily lead-based drawing or fresh ink.
Extended tripod grip:

Another useful way to hold a pencil is in the extended tripod grip. This pencil grip is similar to the same hold as the basic tripod grip- with a triangle formed by the thumb, forefinger, and middle finger. The difference is that the pencil is held, but further up. Because it is similar to the basic grip, this is a comfortable way to hold a pencil for drawing, while allowing more freedom to cover larger areas of a sheet or canvas. It does however, limit the fine detailing aspects of the basic tripod grip.
When holding the pencil in the extended tripod grip, small movements can produce bigger and better results, so it is an ergonomic and efficient grip for sketching. For best results, make sure you keep a relaxed grip on the pencil.
Overhand Grip:

The overhand grip is a popular way to hold the pencil for sketching. The overhand grip allows you to shade with the side of the pencil. It is also useful for vertical drawing surfaces. The overhand grip allows the arm to have a full range of movement which helps with shading precision. The overhand grip is often demonstrated as the ‘correct’ way to hold a pencil for drawing.
Underhand Grip:

The underhand pencil grip is a very loose and relaxed way of holding a pencil. This example is basically a tipped-over tripod grip. However, you can also slide the thumb higher or lower along the length of the pencil. Holding a pencil with the underhand grip is useful for casual, broad sketching, such as with a charcoal pencil.
Experiment with various grips to see which one allows for more freedom and is comfortable for you. Do not force yourself to use an artificial grip. It is about the worst thing you can do for your drawing, creating stress and disturbing the natural flow of the line. With time and practice, you can improve your drawing and become efficient at controlling your pencil/pen strokes.
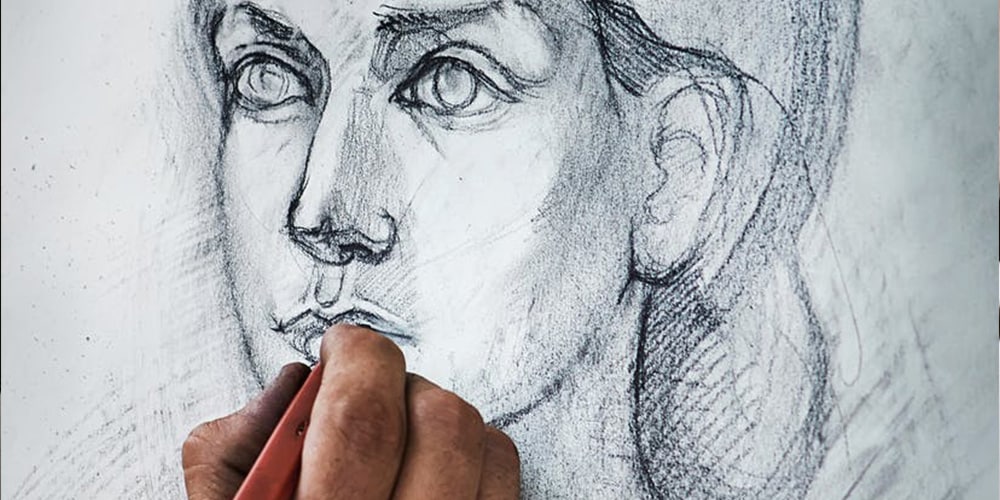
Pick up your pencil, it’s time to draw!
Once you have a good pencil (6B pencil is a nice start for amateurs), you need to begin your training. Start by drawing lines, curves, circles and anything else you can think of and just keep practicing. The practice is the deciding factor when it comes to drawing better. Many of you probably haven’t used pencils for a long time. So you need to loosen up those stiff and lazy arms. Drawing fundamentals clearly defined demonstrations provide easy access to the practice of drawing as well as the history and development of core drawing techniques.
Try drawing circles on a sheet of paper by holding your wrist steady and using your shoulder as a pivot. If your first circles are absolutely horrible, have no coherency, look like ellipses, then congratulations! You’re on the right track.
But there’s much work to be done. Keep practicing till you are able to draw circles like the ones below. Remember to use your shoulder. Don’t choke the pencil with your fingers. You will not get perfect circles in one day, but who has? Rome was not built in a day.

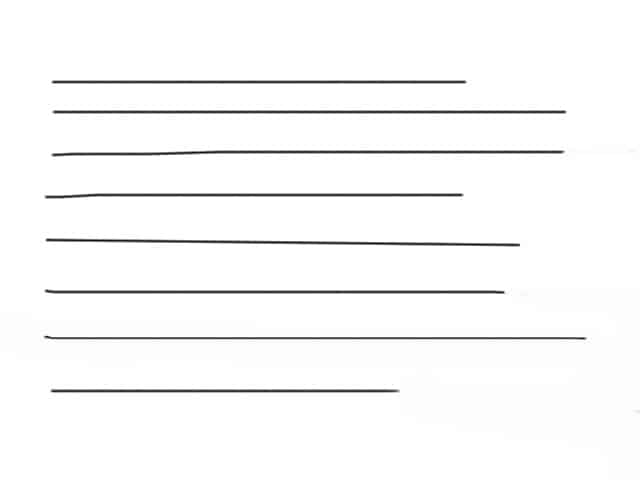
We recommend drawing straight lines for practice as well. Use your shoulders (not wrists) to extend a straight line across the page. The use of scales and compasses in this exercise is prohibited. Do not be discouraged if you don’t get it right on the first try. The idea is to get your arms to loosen up and feel easy and flexible. So it is important not to proceed forward until you’ve become efficient in drawing circles and lines. Keep the circles big so that you don’t fall into the habit of using your wrists for drawing circles.
Draw lines from one end of the page to the other end. Draw horizontal, vertical, and diagonal lines.
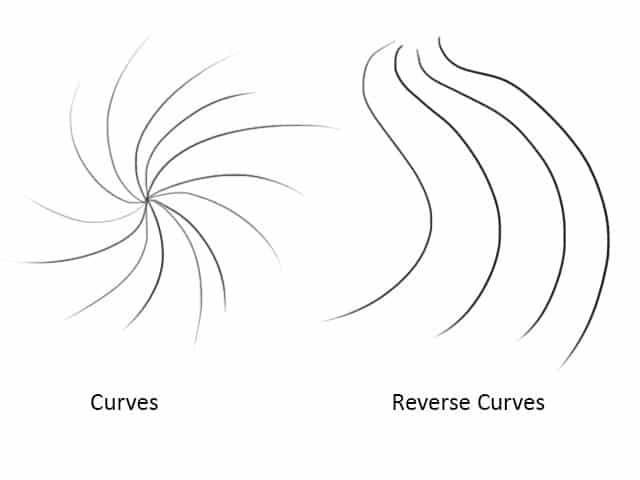
Curves and waves or reverse curves as we call them, are also very important in the “learning to draw” boot camp. Draw lots of curves and reverse curves along with the circles and lines to train your arm. These training exercises are essential to anyone who is learning to draw.
Exaggeration
Your pal, the sketchbook!
Learning to draw is one thing, but putting all that training to proper use is another thing that will help you grow as an artist. After all, what good is an artist who is unable to express his creativity on paper? Well, such an artist would not be very good at his job.
It means, represent shapes giving the illusion of volume and weight on a flat-screen. To achieve this it is necessary to apply basic concepts such as perspective, volume, weight, balance, lighting, etc. The creation of the three-dimensional space of the drawings will help us see in 3D. To do this you have to take into account the volume and weight of the character to avoid falling into symmetry. Another aspect to take into account is that the assembly must maintain consistency and be consistent both in an individual pose and with all those that make up that animation.
All artists have had humble beginnings where they scribbled things here and there, objects, people, places, buildings and even caricatures. These drawings and sketches helped them grow over the years. It helped them to develop a keen observational capacity to draw anything real or imaginative with precision. But where do they put these drawings? A sketchbook.

If you are an aspiring artist, then a sketchbook is your best friend. So go ahead and buy one, keep it with you at all times and draw lots of things in it. Fill it up with all your ideas, doodles, people, and places you might know and see in daily life, basically anything that you want to.
A sketchbook is to an artist what a diary or a blog is to a writer. It will help you keep track of your progress as an artist as time passes by. Hence, it is important to practice drawing in it every day.
Do research on subjects, topics, games, movies that inspire your creativity. Try sketching places you visit and the people around you, as they sit or walkabout.
IMPORTANT: Drawings that you have taken as reference must be noted down as a reference. Include the artist’s name and source if possible for future reference.
Basic Shapes:
What is the best way to learn drawing? Understand what you are drawing. To do that, we need to understand basic shapes. Everything you wish to draw can be visualized precisely through the manipulation and use of basic shapes. For example A can of soda is a form of a cylinder with an exaggerated top and bottom.
So, what are the basic shapes?
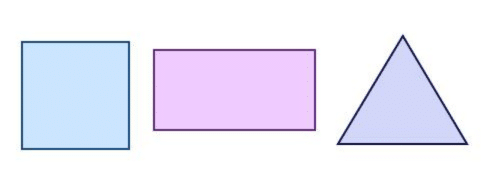
- A Square?
- A Circle?
- A Triangle?
Wrong! When we talk about basic shapes, we refer to the 3D ones such as cylinder, sphere, cube, and cone.2D shapes have only two dimensions – length and breadth.
However, real-world objects occupy a Three-Dimensional space, which allows us to perceive them as having a depth (real). Unlike 3D shapes, 2D shapes are flat and show no visual depth.
Below is a detailed example of the difference between a 2D shape (left) and a 3D shape (right):

- The 2D shape is one-sided and so, it shows no depth. Whereas the 3D shape (e.g. Rubik’s Cube) has more than one side with multiple vanishing points. Thus, we perceive the object as having depth. Below is a list of commonly used basic shapes:1) A Cube.
2) A Cylinder.
3) A Cone.
4) A Sphere. These shapes can be manipulated into different varieties based on the original shape: (e.g.) a cube can be manipulated into a cuboid. It is a non-symmetrical cube with exaggerated width or breadth. In the same way, a cylinder can be manipulated into a pipe, a cone into a pyramid, and a sphere into an ovoid.NOTE: You will learn more about the manipulation of basic shapes at the end of this chapter.
- Drawing Basic Shapes: Now that we know all about basic shapes, let’s move on to drawing a few. Begin with some simple cubes from different angles, as shown below.IMPORTANT: This is a freehand exercise; do not use rulers and other geometrical construction tools. Stick to drawing straight lines as you practice.

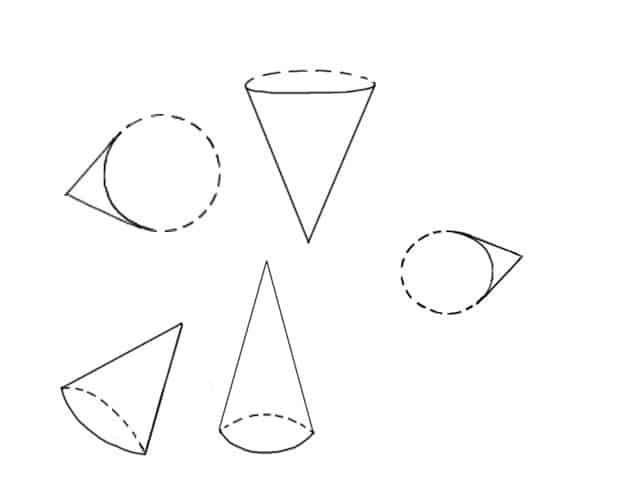
- Draw a few cylinders and cones from different angles as well. This exercise will help you in visualizing these shapes as 3D objects.

The volume of a sphere:
Drawing spheres will require a little effort in understanding how a sphere works as a 3D object. You have to show the sphere as an object of depth.
A sphere is different from other basic shapes in the way its depth is portrayed. Drawing fundamental is the compositional basics of line, form, value, color, texture, and spatial relationships. To show the depth of a cylinder or a cube, we need only show their sides from different angles, which accomplishes our goal – to show the objects are not flat. This doesn’t apply to a sphere, because it is a perfectly round geometrical object which has no sides and will look the same no matter how much it is rotated. So then, how do we show the depth of such an object? We have to show the radius of a sphere from multiple angles. This will show us the sphere’s volume and prove that it is not in fact, a flat object.

A Prelude to perspective:
But how do we do that? Well, we must first learn how to draft perfect circles and ellipses. It is a relatively simple method of construction to create a precise layout for circles and other advanced designs and surface divisions or partitions. This method is mainly used in perspective drawings to achieve precise scaling, creation, and partition of objects. Drawing Fundamentals is a comprehensive and authoritative overview of the history, aesthetics, methods, and materials of the drawing medium. Since a sphere is a geometrical object, we need to construct it as such, which can only be done by constructing it on a perspective grid.
We’ll get to that and explore it in detail in the next chapter.
Volume Manipulation:
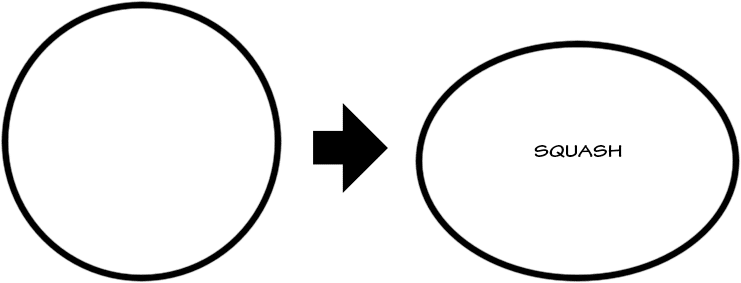
Every object that occupies the three-dimensional space has its own volume. This volume is perceived by our eyes as a depth which makes us believe that the object is real.
Most solid objects never change the appearance. However, soft objects such as a rubber ball and football are an exception. Drawing fundamental focuses on the development of concepts and elements of art. These objects are not made of solid matter, and so they change their shape under natural or artificial force. The volume of the object itself doesn’t change (increase or decrease). Instead, the object adapts to the outside force by evenly spreading its volume within and once the force is suspended it returns to its original shape.
Applying natural (Gravity) or artificial force to such objects on purpose can result in exaggerated forms of their original shapes. This phenomenon is called the manipulation of volume.
Below is an example of what a rubber ball would look like if force was applied to it from above and sides:
The above examples are not too exaggerated. However, in animation these stretch and squash manipulations are further exaggerated, but not entirely. This is done to maintain the object’s original volume. Also, it shows the action better and helps to achieve fluid motion between each frame and thus resulting in smooth animation. Drawing fundamentals are generally universal across different mediums and styles.
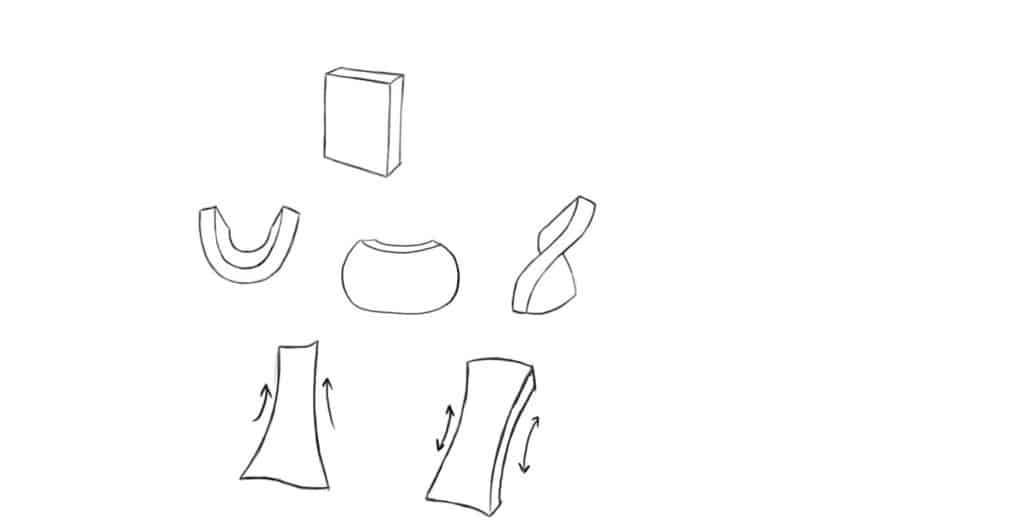
Next, we’ll see what a chunk of rubber (e.g. an eraser) looks like when artificial force is applied to it from multiple directions, simultaneously and separately.
Below is an example of a chunk of rubber, being manipulated to change its shape by applying artificial force:
It is important to remember that objects with multiple sides or faces can be manipulated more by applying force from all sides. A sphere is a uniform geometrical object with no sides. Thus, its volume can only be manipulated by applying force either horizontally or vertically. But as shown above a chunk of rubber or similar objects can be manipulated in various ways: (e.g.) Stretch, squash, bend, squeeze and twist. Having knowledge on drawing fundamentals can help a student understand the basics of drawing. You can further understand how the volume of an object works by studying It in real life – apply the various manipulations to your eraser, rubber ball, football, balloons, etc.